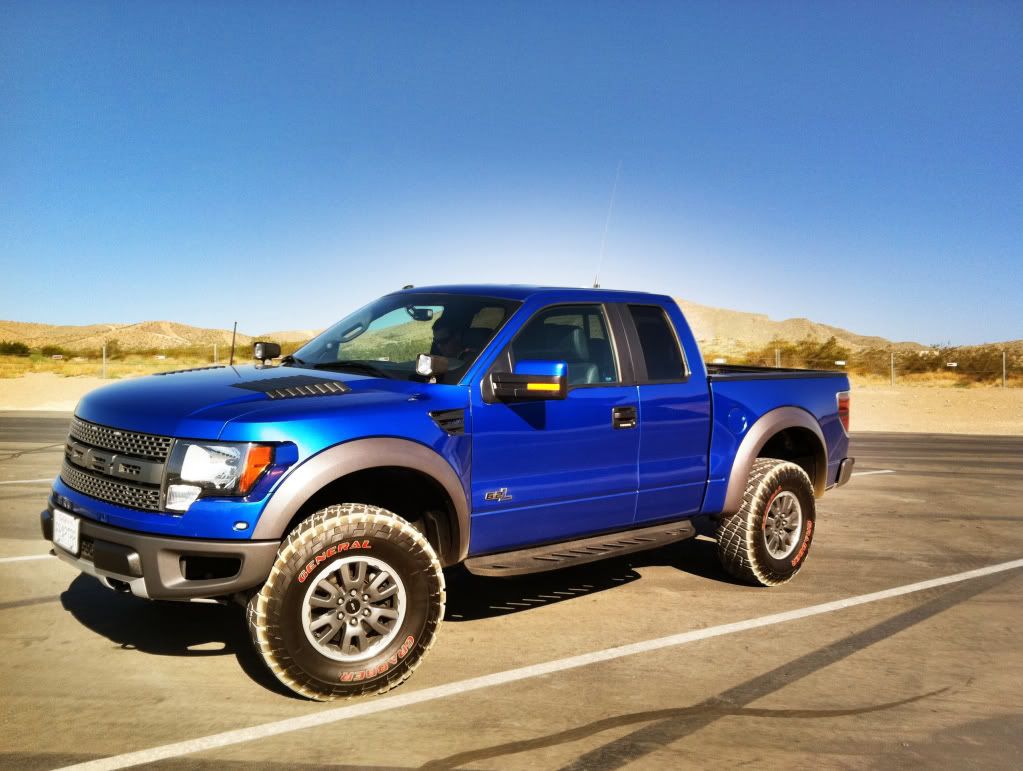
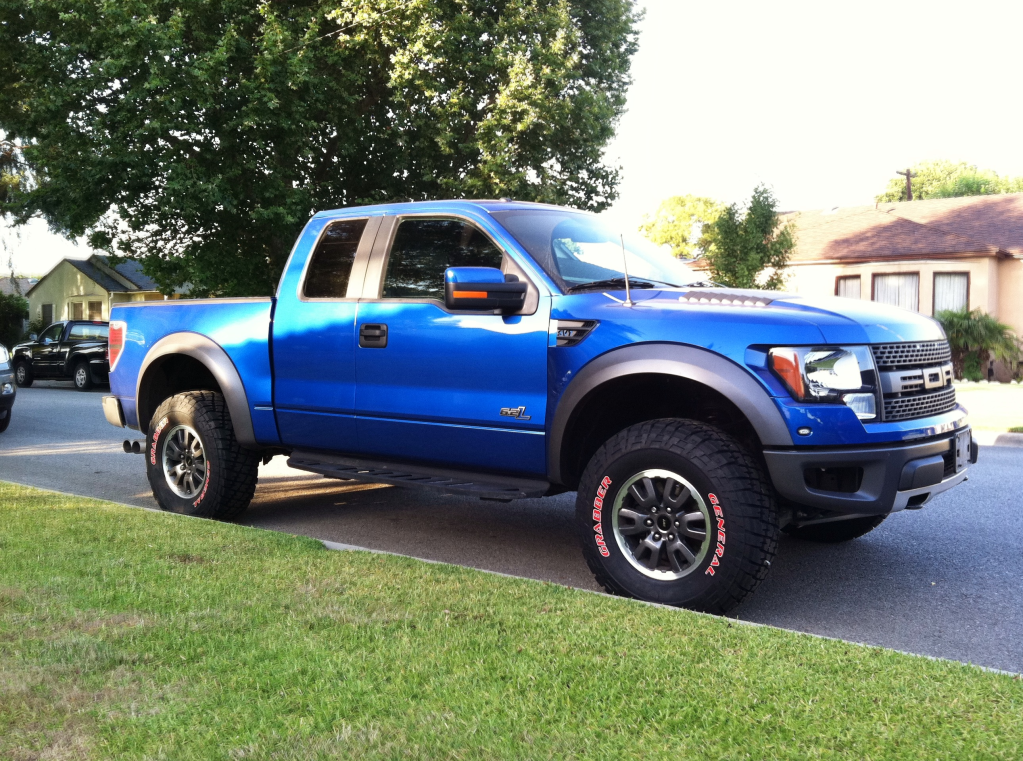
So while my truck was at Outlaw getting the frame and suspension work you saw in the previous post, I had them throw on a few extras that are a necessity while running through the desert! Here is a shot after all the work was done, which also shows the 4" HID lights that I had installed on the upper portion of the hood:
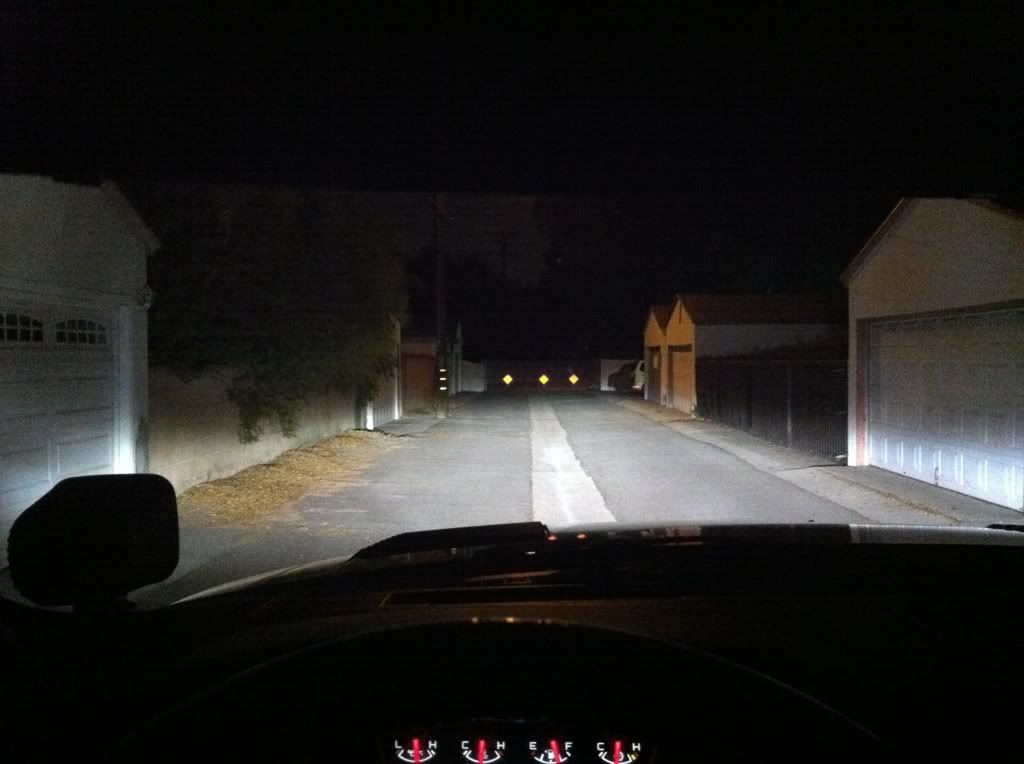
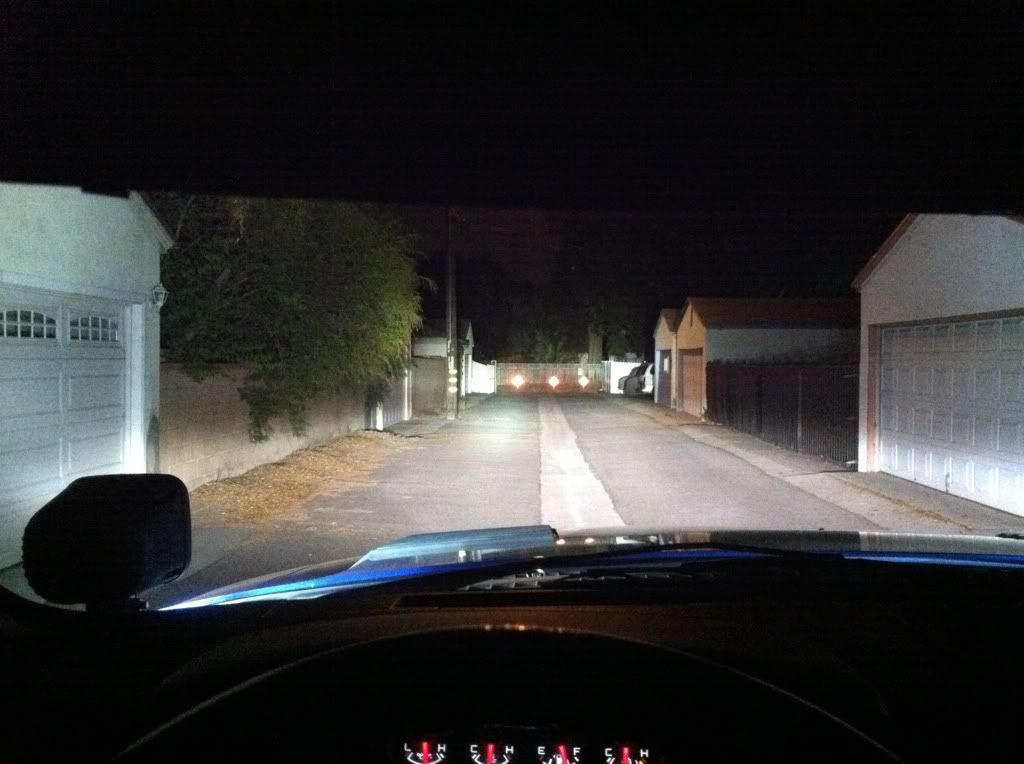
Not too big, but they produce a tremendous amount of light! Here is a comparison between just the stock headlights, and then with the HID spot lights also on.
Stock headlights with HID bulb upgrade:
And here is the comparison, stock headlights with the HID spotlights on as well:
This will make running off road at night much safer, and much easier. I will soon be doing voluntary patrols of the San Bernardino National Forest, so a few add-ons were in order. Aside from the lighting, I also needed to add a way to communicate with the Forest Service, as well as other members of my off road community.
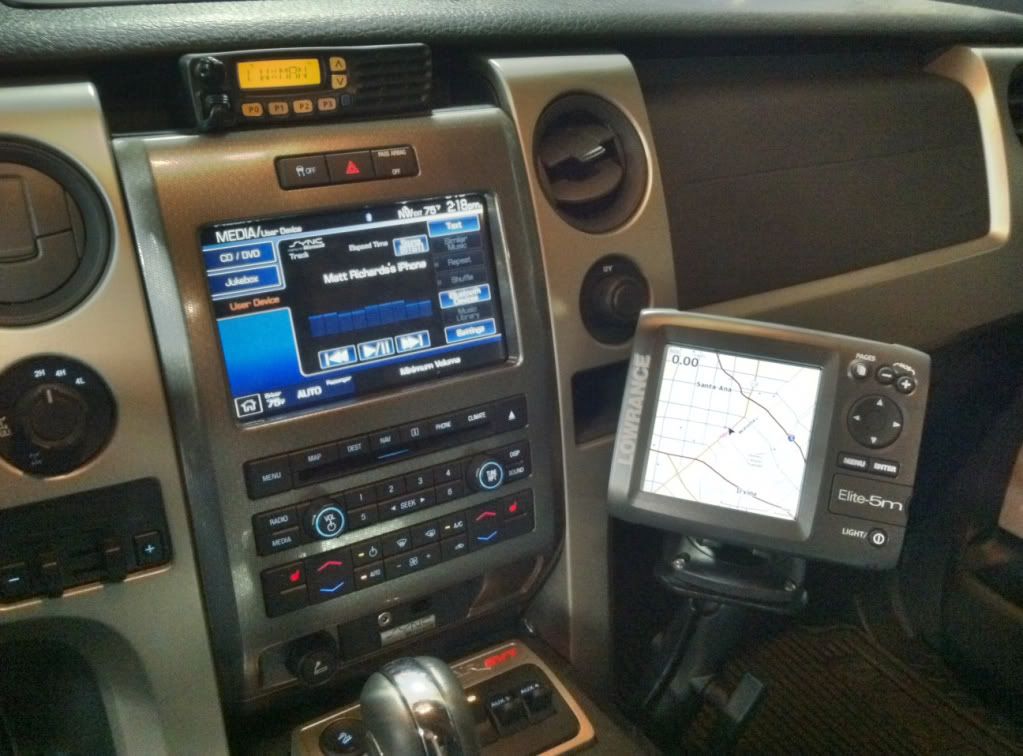
I decided to install a 50-watt Icom VHF race-radio in the truck. Your typical handheld walkie-talkie you buy at the store is 0.5-watts of power. CB radios are 5-watts of power at the most. This is a 50-watt radio, which allows you to transmit distances of 25-50 miles depending on surrounding terrain. Most Forest Service channels and a few other public channels are on mountain top repeaters all over Southern California. With this radio, you will likely always find yourself within reasonable distance of one of the many repeaters.
Lastly, I needed a way to navigate all of the trails in the Southern California area. The factory GPS simply does not have enough off-highway roads to be useful. It's surprising how many trails are actually on the Raptor navigation, however this still is not enough for what I will be doing. At Outlaw's recommendation, I also installed the Lowrance Baja Elite 5M navigation unit. This unit is a high resolution full color display, and is capable of storing thousands of points. On top of that, the class that I'm taking will provide a data file with ALL of the southern california trail systems for this navigation! It will be literally impossible to get lost with the proper setup like I intend to have.
Here is a shot of the navigation unit, and the new radio which Outlaw flush-mounted into the dash above the factory navigation and switches. Both fit the cab VERY well, and will be used thoroughly during my new "job" as a volunteer employee of the park service.
Stay tuned! Now that I'm all fitted with everything I need... my first real test of this equipment will be my upcoming 4-day Death Valley Expedition with a friend of mine. 4 days, camping each night, across the entire Death Valley basin area. Should be a GREAT test of the new toys!
Saturday, September 17, 2011
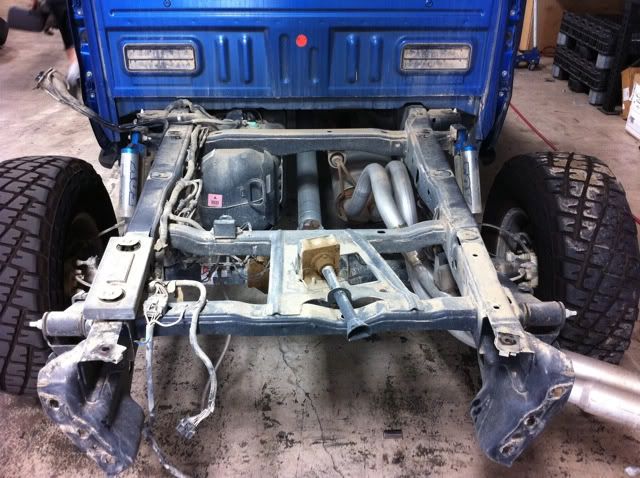
Well, my truck finally went in to Outlaw Raptor for some long awaited work on the rear frame. My truck suffered from a slightly bent rear frame, after hitting a high speed bump that was about 12" high, at about 55-60MPH. This is caused by the rear bump stop being impacted at a high velocity, causing the frame to crease in the exact spot the bump stop is mounted. My truck wasn't too badly affected, although it was noticeable enough visually, and would eventually get worse if not corrected.
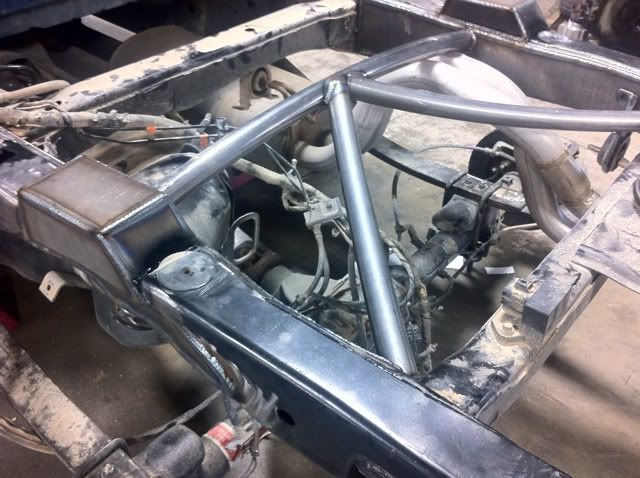
Outlaw Raptor has a full reinforcement and supplemental bump stop kit that they have engineered, and my truck is one of the first to receive this new setup. Before I get to that, here is a picture of the truck's bed and what it looked like after the frame was bent:
You can see that the rear of the bed is slightly angled down, from the frame being bent. Not terrible, but enough where it was driving me a little crazy seeing it every day. So the first step for Outlaw was to remove the rear bed to actually straighten the frame before reinforcing it. Here is what the frame and rear end look like before the fix, with the bed removed:
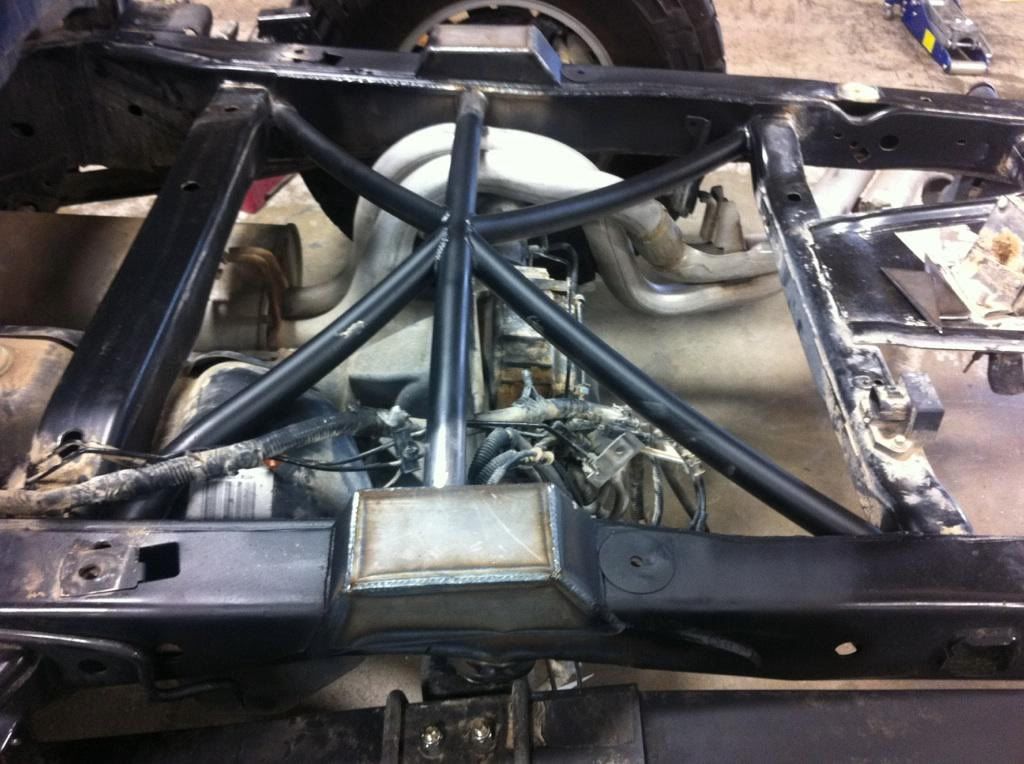
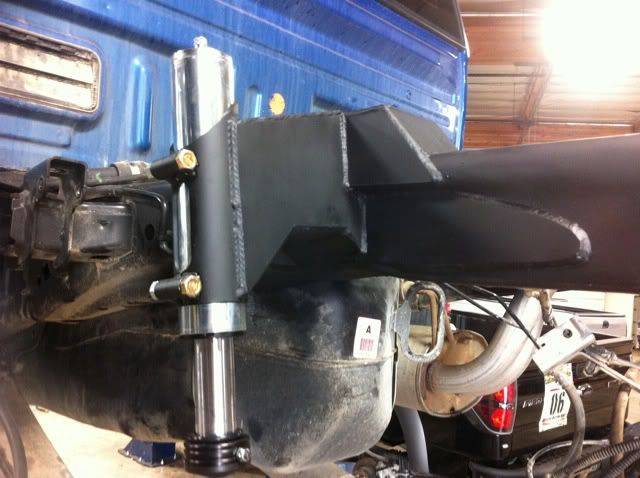
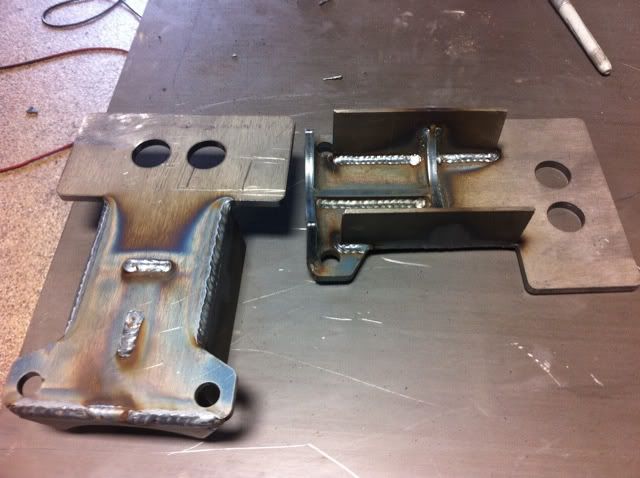
Not a whole lot back there! The following picture sets show you the frame reinforcement, as well as the additional supports installed by Outlaw across the rear frame. Overall, a VERY beefy setup!
New Fox 2.0 hydraulic bump stops were added, to properly absorb rear axle impacts, and installed in a location that will not bend the frame! This setup has been THOROUGHLY tested by Outlaw Raptor, and has been proven to take some serious abuse without any negative outcomes.
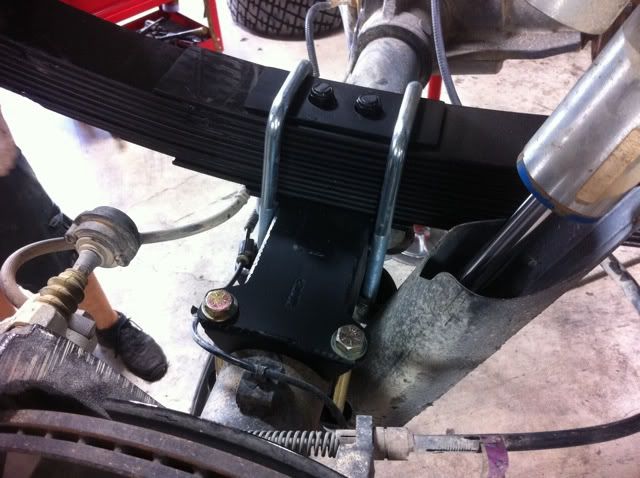
Next was the Deaver rear springs, which are a progressive spring designed to absorb impacts much better, as well as reduce the amount of "bounce" or "donkey kick" as they call it, after hitting a hard impact. They actually have a rebound spring built in, to help manage the rear end much better:
You can see the amount of rear travel now... should be a very nice ride off road! I'll be taking it off road very soon to test the new add-ons, and follow up shortly.
Today's trip bring us to Lake Cuddyback... It's a great location for a variety of terrain from steep hill climbs, to wide open dry lake beds. One of the largest and flattest lake beds in the area, and hardly ever any other vehicles on it.
Difficulty is probably a 2/10 overall. Vehicle damage likelihood: VERY low chance of mechanical damage. Depending on the trail you take there is low to medium paint contact from branches... also known as "Pin Striping", all of which are light surface scratches, all buffing out.
We wanted to try some new trails that I've seen, but never taken. I also wanted to test out the Find Me Spot GPS tracking device that I've been using, but never tested the tracking function. Here is the link to the tracking from the Spot device:
Once there, we double checked the truck to make sure everything was tied down, and aired the tires down a little for off-road use. The last picture is the view from the start of the Cuddyback Rd. trailhead, heading East towards the dry lake bed.
First we headed to Lake Cuddyback itself, which is a dry lake bed most of the year. Occasionally it gets water and turns to a mud bog, but more often dry than not. At the first major fork in the road, stay to the left to head towards the lake bed. It's about an 8 mile drive from 395 to the lake bed, most vehicles could make the drive, even 2WD vehicles would have no issues if taken slowly.
Spent some time playing around on the dry lake bed, which for the most part was very flat and in great shape. Alan volunteered to get dusted, and took a quick video of me drifting around him:
Although the camera didn't pick up the dust well... his face definitely had a nice "dusting", but he's a good sport as always.
From there, we headed up a road on the northeast corner of the lakebed, which heads towards an old silver mine, and an old ranch setup, with what appeared to maybe be a well a long time ago. The road is relatively well groomed which the exception of a few parts, and only a few tight squeezes and pin striping on the truck! First place we stopped was here:
We could see a road up a mountain to the north, and what looked like an old mine entrance. I had been up there before in the RZR, but not in a full size truck. The road was a reasonably steep climb, but no problem for most 4x4 vehicles. At the top was a great photo opportunity, and a short walk to the Silver Mine entrance.
There is a short mine tunnel you can walk into about 150-200 feet, which ends at a rock wall. Usually you can find some mice at the end of the tunnel! Last time there was about 10 of them, this time there was just one large rat with a nest. Here is the entrance to the mine (Alan and Erik pictured):
From there, we headed northeast along Granit Wells Rd, and around the north side of a small mountain which was covered in patches of volcanic rock. Almost looked like shadows from the distance, but the rock itself was very black. Took a shot at this location:
Wanting to start heading back in the general direction of where we started, we tried circling around the mountain and started heading east/southeast as we could. Found a good spot for lunch with some old water tanks and mining equipment. A few roads from this location stretched out for miles in a straight line... could definitely spend more time exploring some of them in the future.
To head back, we headed west towards the 5-point intersection we stopped at earlier. Along the way we found a really nice stretch of trails with plenty of opportunities for some high speed driving. Eventually we found the perfect series of hills, and a great set of jumps to take in the Raptor. Decent approach, and would set the truck landing straight on 4 wheels. Alan hopped out again, to take a great video clip of one of the better jumps we found:
Landing wasn't too bad, although a Pringles can decided to explode on impact, sending crumbs all over the back seat and floor... Erik enjoyed the ride from the back seat, but that bring up another topic... Why doesn't the Raptor have and grab handles in the back seat?!?!
Found a few more cool spots on the way back, including a fairly deep mine shaft... why do the sides of the mine shafts always have to slope into them with loose tiny gravel? Kinda hard to get close without risking your life!
Decided to climb down one of the steep slopes leading up to the mine shaft, and set a new personal best for steepest incline that I've seen on the gauges. We were definitely hanging from the seat belts.
After that it was a scenic, but uneventful ride back to US-395 to head back home.
All in all, it only took us about 3.5 hours to do everything... makes for a nice short day trip. With temperatures of 105-110 the whole time, you can't really hang out much longer anyway. Here is the point we ended up exiting from: 5-point intersection to Trona rd (Google Maps)